Terry Portch introduces a triple-stranded approach to helping learners understand tricky new terminology…
Terry Portch introduces a triple-stranded approach to helping learners understand tricky new terminology…
Today you will…
...understand the three different methods how glaciers can move
...practise using three different learning techniques to improve your understanding of key words
This lesson was used with a (very) mixed ability Year 11 class studying the ‘Ice on the Land’ topic as part of the AQA, a GCSE Specification for Geography. They were enjoying the challenge of this new topic, but finding it rather difficult to grasp the relevant terms. The lesson’s aims are to teach the three main methods of how glaciers move, but also to use three different ways of understanding new terminology: reducing the definition, drawing the definition, and acting the definition. These techniques are easily applied to other topics – not just in geography, but in other subjects as well. They are useful in getting students to understand key words/definitions and offer a more active and effective alternative to simply copying them down. They provide a fun and active approach to dealing with key words, concepts or processes.
Starter activity
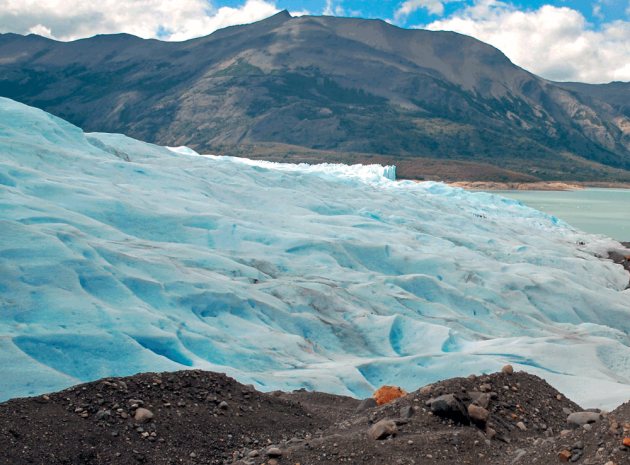
Place an ice-cube (the larger the better) on a flat surface, at a slight angle (not too steep, the idea is that the ice-cube stays still). Ask the students, how will the ice-cube move? You may like to place an obstacle in the way of the ice-cube and ask the students how will it move past the obstruction. This can then be expanded upon by showing a short clip or pictures that demonstrate how glaciers move down slopes, which may include some obstacles, and therefore guide their thoughts as to how exactly a glacier moves, aside from the assistance of gravity.
Main activities
The class will need to be organised into small groups beforehand. Each group will need some paper/pencils or a mini-whiteboard and pen. I would also advise that they are of mixed ability to assist weaker students.
There are three methods by which glaciers move: basal slip, rotational slip and internal deformation. Each group will need a ‘technical’ definition of each (either on a sheet, projected onto an IWB or both). Which technique for understanding you apply to which movement is up to you – however, I found it best to use the same method for one movement. How the main lesson works is as follows:
Reduce the definition
Students read the definition, and write down what they feel are the five most important words. There is an opportunity for differentiation here: allow weaker students to note down more than five words, and the more able to use fewer than five words. Then as a group, they share what they have noted and compare. Using a mini-whiteboard they agree on five words and show them to the rest of the class. This allows you as a teacher to check that that they are noting important words, and to question their choice (thus monitoring their understanding). Once you are satisfied with their understanding, they then use these words only (remove any definitions you have given them) to write their own definitions.
Draw the definition
Students read the definition of the second type of glacial movement, and then have to draw a diagram that shows this movement. This can be differentiated by the amount of annotations that they are allowed to use (I tend to say no words/labels/annotations to make it more difficult). This will focus their thinking on the key aspects of the type of movement, and they have to comprehend the definition to be able to draw an accurate diagram. To check, you can ask one student to draw their diagram on the board, and ask either him/her, or another student to talk through the definition. Alternatively, the students can do this in their groups.
Act the definition
This can be a lot of fun! The students have to read the definition, and then as a group, act out the movement. They can work it out in their groups, and then perform in front of the class. This will enable all to see if they can demonstrate how the glacier moves.
Any variety of these methods can be used to teach geographical processes, key concepts, definitions, etc. They can also be used for revision – students either show their word list, drawing or act, and the rest of the class have to guess which key word they are demonstrating.
Summary
After each activity, or at the end, you can use traffic lights to see how well each student feels that he/she understands each type of movement (I tend to ask students to use thumbs up/to the side/down to show their level of understanding). Those who are unsure or do not have a complete understanding can be asked what aspects they do understand, and which aspects they are unsure of. Then students who feel that they do fully understand the movement can be asked to explain the relevant point to the class. This enables you as a teacher to see the level of understanding across the class.
Alternatively, the students can be questioned which method (reduce, draw, act) that they felt worked best for them in terms of their learning, and how it could be applied to home learning or revision. This can then be used in future lessons.
Finally, a past exam question (or one you set yourself) based on how glaciers move can be set, which can then be collected in and marked to see how much students have learnt about each method and whether they can apply this learning. This can be differentiated by having a higher and foundation tier question. Weaker students could be given a diagram of one of the glacial movement types to describe.


Terry Portch introduces a triple-stranded approach to helping learners understand tricky new terminology…